Nord VPN on üks vanu mängijaid VPN-maailmas ja selle Windowsi rakendust peetakse arvutimaailma parimate hulka. Nord VPN on funktsionaalsuse ja paindlikkuse mõttes väga mitmekesine. Lisaks platvormidevahelisele toele on sellel ka erinevad serverid, mis asuvad erinevates riikides ja mille vahel saate valida.

Vaatamata sellele, et rakendus on turul olnud üsna pikka aega, teatavad kasutajad, et nad ei saa ühendust Nord VPN-iga. Kas see lõpetab ühenduse loomise pärast võimalikku värskendust või kui DNS-serveritele saadetud päring tagastab vastuse „aegunud”.
Mis põhjustab Nord VPN-i ühenduse loomata jätmist?
Kuna VPN kasutab kogu arvutisüsteemi Interneti-arhitektuuri, on mitu põhjust, miks teie Nord VPN ei pruugi korralikult ühendust luua. Mõned neist on loetletud allpool.
- IPv6: Ilmselt ei toeta Nord VPN üheski suhtluses IPv6-protokolli. Nii et kui see on lubatud, ei pruugi te ühendust luua.
- Kolmanda osapoole programmid: kolmanda osapoole programmid on teadaolevalt vastuolus tarkvarasüsteemiga ja võistlevad ressursside pärast; seega ei ühenda see korralikult.
- Võrguadapter: Kuna Nord kasutab Internetiga suhtlemiseks eraldi võrguadapterit, võib juhtuda, et võrgukaart ei tööta korralikult ja peate selle taaskäivitama.
- Viga võrgus: Mõnikord võivad teie arvuti võrgukonfiguratsioonid olla veaolekus, mis ei tekita üldse ühendust. Sel juhul võime proovida värskendada kõiki muutujaid.
Enne kui lahendustega alustame, peate veenduma, et teie Internet tegelikult töötab . Kui teie internet ei tööta korralikult, ei suuda Nord korralikku ühendust luua ja teile juurdepääsu tunneldatud võrgule.
Veenduge, et kasutate privaatvõrku (mitte kooli, töökohta ega avalikke kohti, näiteks haiglaid) ja volitusi pole kaasatud. Kui olete uuesti kontrollinud, kas teie internet töötab, jätkake.
1. lahendus: IPv6 keelamine
IPv6 (Internet Version Protocol 6) on arvuti võrguarhitektuuris uusim IP-versioon. Vaikimisi kasutame endiselt IPv4 ja pole ikka veel püsivalt IPv6-le üle läinud. Kuid seal võib olla mõni teist, kes on alustanud Interneti-ühenduse jaoks IPv6 kasutamist. Tundub, et IPv6 ei tööta Nord VPN-iga korralikult. Seetõttu keelame selle ja kontrollime uuesti.
- Paremklõpsake oma tegumiribal oleval võrguikoonil ja valige Ava võrgu- ja Interneti-seaded . Nüüd klõpsake sätetes suvandit Muuda adapteri suvandeid .

- Kui olete adapteri seadetes, paremklõpsake kasutataval adapteril ja valige Atribuudid .
- Kui adapter omadused, tühjendage IPv6 valik ja veenduge, et IPv4 on lubatud. Salvestage muudatused ja väljuge. Nüüd taaskäivitage arvuti ja kontrollige, kas viga on lahendatud ning kas saate ühenduse luua Nord VPN-iga.

2. lahendus: kolmanda osapoole rakenduste kontrollimine
On arvukalt muid rakendusi ja programme, mis näivad olevat Nord VPN-i kasutamisel vastuolus. Kui ressursile juurdepääsu proovib rohkem kui üks rakendus, on võistlustingimus ja need ei tööta ootuspäraselt.

Peaksite üles tooma tegumihalduri (Windows + R ja 'taskmgr') ning kontrollima kõiki taustal töötavaid rakendusi. Üks selline rakendus, mis teadaolevalt probleeme tekitas, oli Glasswire Elite . Kui proovite Nord VPN-iga ühenduse luua, desinstallige see või keelake see.
Märkus. Võite proovida ka arvuti alglaadimist puhastada. See keelab kõik välised kolmanda osapoole rakendused ja käivitab ainult vajalikud. Nüüd võite proovida ühenduse loomist. Kui olete edukas, tähendab see, et probleemi põhjustas mõni rakendus. Võite minna tagasi, lubades iga rakenduse ja kontrollides uuesti.
3. lahendus: Serveri asukoha muutmine
Nord VPN annab kasutajatele võimaluse valida oma serveri asukoht. Need serverid on hajutatud üle kogu maailma ja võimaldavad ühenduvust vastavalt nende geograafilisele asukohale, st eeldatakse, et teile lähemal asuv server on kiirem. Püüame muuta serveri asukohta, mida proovite ühendada, ja vaatame, kas see lahendab ühenduse mitteühendamise probleemi.
- Käivitage Nord VPN ja klõpsake pealkirjal Serverid , mis asub rakenduse ülaosas.

- Valige nüüd varasemast erinev server ja pärast valimist proovige VPN uuesti käivitada. Kui teil on sama käitumine, proovige valida mõni teine server ja testige võrku mõnel teisel veebisaidil.
Lahendus 4. Taaskäivitage võrk / TAP-adapter
Nord VPN loob teie arvutisse virtuaalse võrguadapteri, mida saab kasutada teabe edastamiseks. See toimib nagu sild, milles Nord VPN muudab sätteid, et saaks VPN-ühendust luua ja säilitada. Mõnikord juhtub see tõrkeolekus, mis põhjustab teie VPN-serveriga ühenduse loomist. Taaskäivitame adapteri korralikult, mis tagab kõigi selle konfiguratsioonide taaskäivitamise.
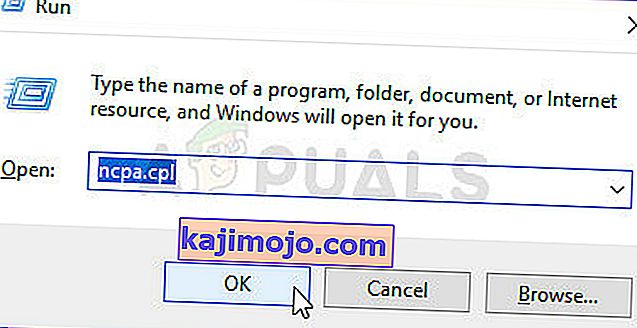
- Vajutage Windows + R, tippige „ ncpa. cpl ”dialoogiboksis ja vajutage sisestusklahvi.
- Kõik võrgukaardid kuvatakse teie ees. Valige TAP-adapter, paremklõpsake seda ja valige Keela .

- Pärast selle keelamist oodake minut. Seejärel paremklõpsake seda uuesti ja valige Luba . Nüüd proovige ühendada Nord VPN ja vaadake, kas see teeb trikki.
Lahendus 5. Võrgu korstna loputamine
Leidub lugematu arv näiteid, kus arvuti võrgupinu loputamine (värskendamine) lahendab mitmesuguseid VPN-iga seotud probleeme (sh Nord). See protsess loputab teie DNS-i ja IP-sätted ning veendub, et pole valesid sätteid, mis võivad olla rakendusega vastuolus.
- Vajutage Windows + S, tippige dialoogiboksi „käsuviip”, paremklõpsake rakendusel ja valige käsk Run as administrator .
- Kui olete kõrgendatud käsuviibas, täitke järgmised käsud ükshaaval ja seejärel iga käsu järel klahv Enter:
ipconfig / release ipconfig / flushdns ipconfig / uuendada netsh winsock reset netshi liides ipv4 reset netsh liides ipv6 reset netsh winsock reset kataloog netsh int ipv4 reset reset.log netsh int ipv6 reset reset.log

- Now close the command prompt and try launching Nord VPN again. Check if you can connect with it properly.
Solution 6: Reinstalling Nord VPN (along with the TAP adapter)
If all the above methods don’t work, you need to make sure that your Nord installation is proper and there is nothing wrong with the installation files. The TAP adapter will also be reinstalled in the process because Nord VPN manages the adapter and it is only for its use. Make sure that you are logged in as an administrator. If reinstalling doesn’t work, make sure that your credentials are correct which you are entering the services have not expired.
- Press Windows + R, type “appwiz.cpl” in the dialogue box and press Enter.
- Once in the application manager, search for the entry Nord VPN from the list, right-click on it and select Uninstall.

- Now restart your computer and download the application again from Nord VPN’s official website. Now after entering your credentials, try connecting again and check if you can establish the VPN connection correctly.
Solution 7: Using an Alternative VPN Service
There are numerous VPN clients out there in the Windows market. However, we recommend or readers to try CyberGhost. This VPN service is as simple as it gets and also provides you with servers located at different countries. It even has separate VPN servers for streaming Netflix and BBC with ease. Follow the steps below to download the application and get your connection secure in no time.
- Download CyberGhost from (here).

- After downloading the VPN, install it on your computer. You might be asked for proper permissions. Make sure that you are logged in as an administrator and press Yes to all the permissions asked.
- After CyberGhost is installed on your computer, launch it. Here you will see a list of different servers available along with the distance from your actual location (more distance means slower internet).

- After selecting the server, click on the power button present at the right-hand side of the application. You can also select dedicated servers for torrenting and streaming (present at the left navigation pane).
Solution 8: Disable Firewall
In some cases, the default Windows Firewall might be preventing the application from working properly. Therefore, in this step, we will first be allowing it through the Firewall and make sure that it isn’t blocked by the Firewall and then we will also make sure that Windows Defender has it added as an exception. For that:
- Press “Windows” + “R” to launch the Run prompt.
- Type in “ControlPanel” and press “Enter” to launch the classical control panel interface.

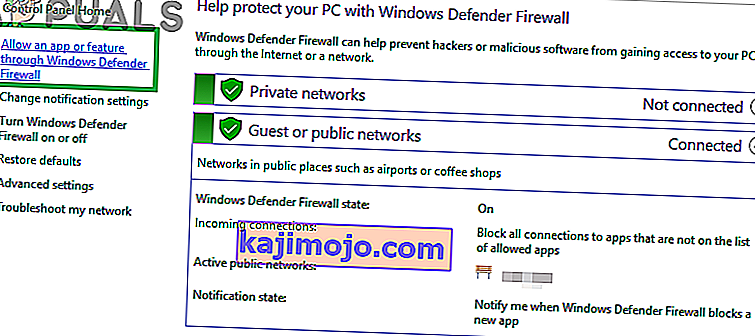
- Click on the “View by:” button, select “Large Icons” and then click on the Windows Defender Firewall option.
- Select the “Allow an app orfeature through the Firewall” button on the left pane and then click on the “Change Settings” button and accept the prompt.
- From here, make sure that you check both the “Public” and the “Private” options for Nord VPN and its related applications/drivers.
- Save your changes and exit out of the window.
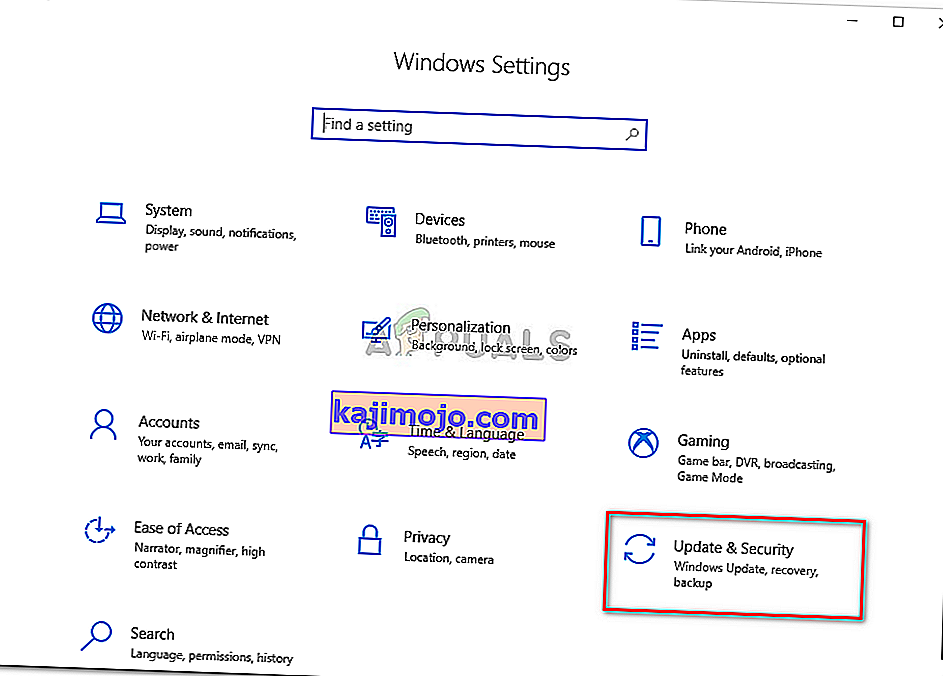
- After that, press “Windows” + “I” to launch the settings and click on the “Updateand Security” option.
- From the left pane, click on the “Windows Security” button and then click on the “Virus and Threat Protection” button.
- Select the “Manage Settings” button under the Virus and Threat Protection Settings heading.
- Scroll down and click on the “Add or Remove Exclusions” button in the next window.
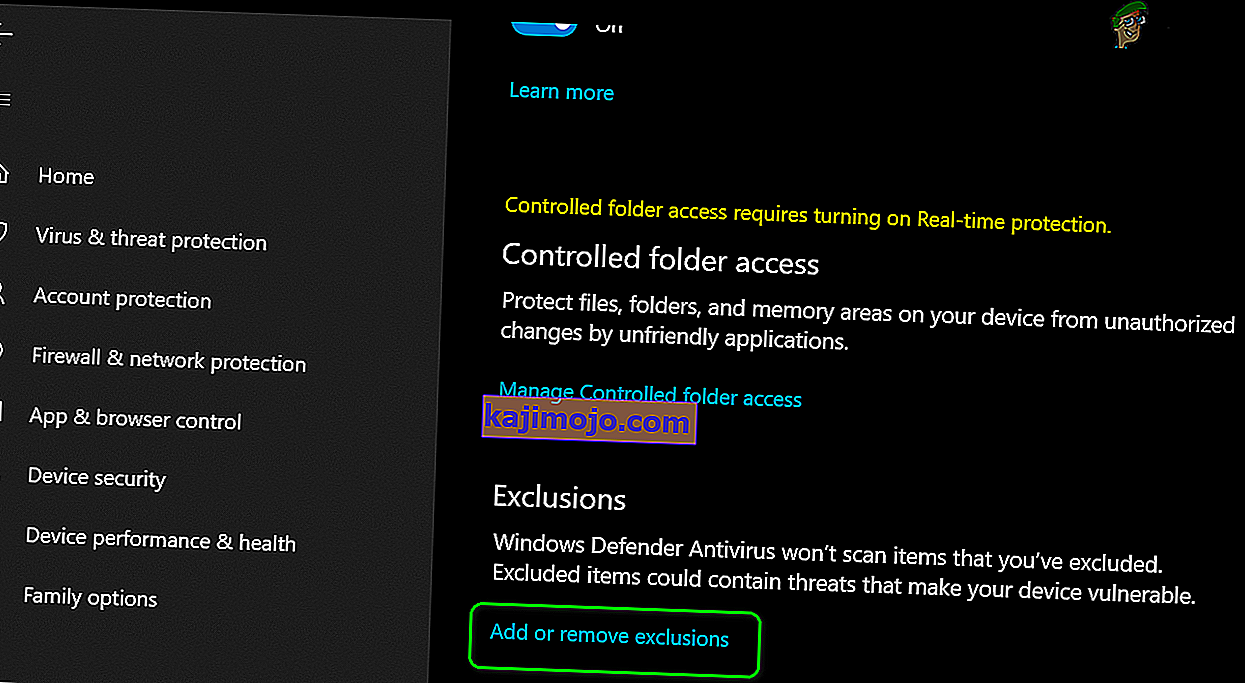
- Click on the “Add an Exclusion” option and select “Folder’ from the File type.
- Make sure to specify the Nord VPN folder and exit out of this window after saving your changes
- Check and see if doing so has fixed the issue with Nord VPN not connecting.


Solution 9: Change NordVPN Protocol
It is possible that Nord VPN might be running into issues while trying to connect to its servers due to the protocol configuration in its settings. If one type of protocol isn’t working for you, it is always recommended to try and switch to the other protocol to make sure that the issue isn’t tied to the wrong selection of the protocol type automatically or manually. For that:
- Launch NordVPN and make sure to disconnect from any currently active sessions.
- Click on the “Gear” icon on the top right corner and go into the settings.
- Click on the “Advanced” option from the left-hand side menu.
- Click on the “Protocol” dropdown and check on “TCP”.
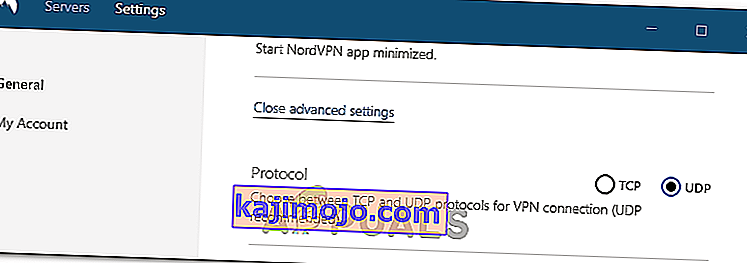
- This should change your protocol from TCP to UDP.
- Check to see if doing so fixes the issue for your computer.
- To Verify that none of the protocols work, make sure to repeat the steps and select “UDP” instead of TCP and then check again.
- If none of the selected protocols are able to make a connection with the server, move on to the other fixes.

Solution 10: Changing DNS Server Configuration
DNS Servers are used by the computer to establish a stable and secure internet connection with other sites on the internet, however, if the computer is unable to detect the DNS settings properly, or if the selected DNS server is facing outage, Nord VPN might not connect properly. Therefore, in this step, we will be changing the DNS configuration to ensure that DNS isn’t an issue. For that:
- Press “Windows” + “R” to launch the Run prompt.
- Type in “ncpa.cpl” and press “Enter” on the keyboard to launch the network configuration panel.
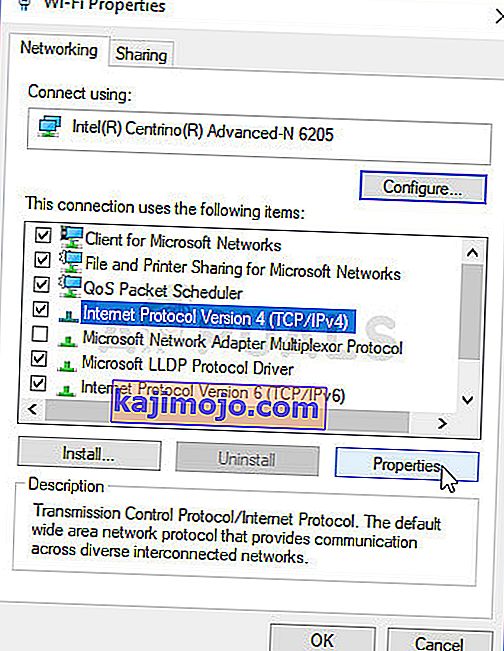
- Right-click on your internet connection and select the “Properties” option.
- Double click on the “Internet Protocol Version4 (TCP/IPV4)” option and check on the “Use the following DNS addresses” button.
- At first, type in “8.8.8.8” and “8.8.4.4” in the primary and the secondary DNS addresses field respectively and click on “OK”. After that, check to see if NordVPN is connecting, if it isn’t, try to use “103.86.96.100” and “103.86.99.100” in the primary and the secondary fields respectively.
- Check to see if you are able to make a connection by selecting those DNS servers.


Solution 11: Opening Ports
For some people, the issue might arise if the ports that NordVPN uses to communicate with its servers are being blocked by your router. For security reasons most routers often block ports used by VPN/Network Tools to prevent any alterations to your connections and if that is the case, we will have to open the ports by logging in to the router’s control panel. For that:
- Press “Windows” + “R” to launch the Run prompt and type in “cmd” and then press “Ctrl” + “Shift’ + “Enter” keys on your keyboard to provide admin permissions.

- Type in the following command in the command prompt to list the IP information.
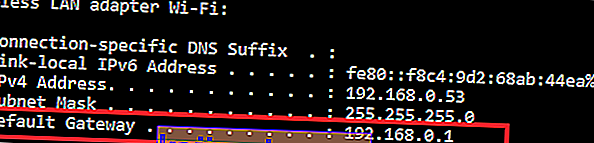
ipconfig /all
- The computer will list all the information of the network adapters connected to your computer.
- Under the default gateway option, after the mac address, there should be an IP address that should look something like “192.168.x.x”.
- Copy this IP address and launch your browser.
- Paste the IP address within a new tab on the browser and press “Enter” to navigate to the browser’s login page.
- Once on the login page, log into the control panel with your credentials, both of which, i.e the username and password should be written on the back of your internet router. If not, then the username should be admin and the password should be the Wifi password that you use to connect your devices.
- After logging into the Control panel, look around for a “NAT” or “Port” option that allows you to forward ports.
- Type in “500” and select “UDP” from the list.
- Click on “Save” to forward the 500 UDP port and exit out of the control panel after the change has been made.
- Try connecting with Nord VPN and check to see if the issue persists.


Solution 12: Use Hotspot
Mostly, this error can be fixed simply by employing your mobile’s hotspot connection instead of the Wifi or the Wired connection that you are already using on your computer. This does seem an inconvenience for Data conscious people but it seems to be the only way some people are able to connect through Nord VPN as some routers block it completely.
Note: In addition to this, you can try to change the firmware on your router to avoid any permanent blocks put from the router or to eliminate any bugs with the connection.