0xc000000e sisselogimisel viga käivitamisel Windows tähendab, et olete tegelevad rikutud Boot Configuration andmed. Buutimise konfiguratsiooniandmed on kõigi uuemate Windowsi arvutite käivitamisega seotud valikute ja sätete ülemaailmne pood.
Selle tõrke saate seadme käivitamisel ja teile kuvatakse must ekraan, mis annab teile juhised arvuti parandamiseks installiketta või taasteketta abil. Kahjuks on selle probleemi lahendamiseks ainus viis selle taasteketta olemasolu, nii et enne alustamist peaksite selle oma kätte saama. Kui teil seda pole, on selle loomine Rufuse või Windows Media Creationi tööriista abil mis tahes teisest arvutist või sülearvutist üsna lihtne .

Samuti peate käivitama oma BIOS-i, et muuta alglaadimise järjekorda ja teha arvuti alglaadimine kõvaketta asemel taastekettalt. Selleks toimige järgmiselt.
- Sisestage BIOS-i või UEFI seaded, vajutades enne Windowsi käivitamist emaplaadi tootja määratud klahvi. See võti on olenevalt tootjast tavaliselt Esc, Delete, F2, F8, F10, F12 või Backspace. Võite teha veebiotsingu BIOS-i sisestamise kohta, millele järgneb arvuti mudel.
- Kui olete seal sees, navigeerige alglaadimisse. Buutimisjärjekorra muutmiseks kasutage BIOS-is leiduvaid juhiseid ja määrake kas CD-ROM või USB-port esimeseks seadmeks, sõltuvalt sellest, kas teie taasteseade on CD- või mälupulk .
- Salvestage seaded ja väljuge.

1. meetod: taaskäivitage alglaadimise konfiguratsiooniandmed
Selleks peate oma arvuti taaskäivituskettalt käivitama. Kui olete oma BIOS-i konfigureerinud ülaltoodud toimingutega, saate seda teha, vajutades suvalist klahvi, kui viip kuvatakse ekraanil. Kui arvuti on taastekettalt taaskäivitatud, toimige BCD taastamiseks järgmiselt.
- Kui Windows Setup dialoogiboksis määrata kõike õigete väärtuste, valige oma keel ja klõpsake
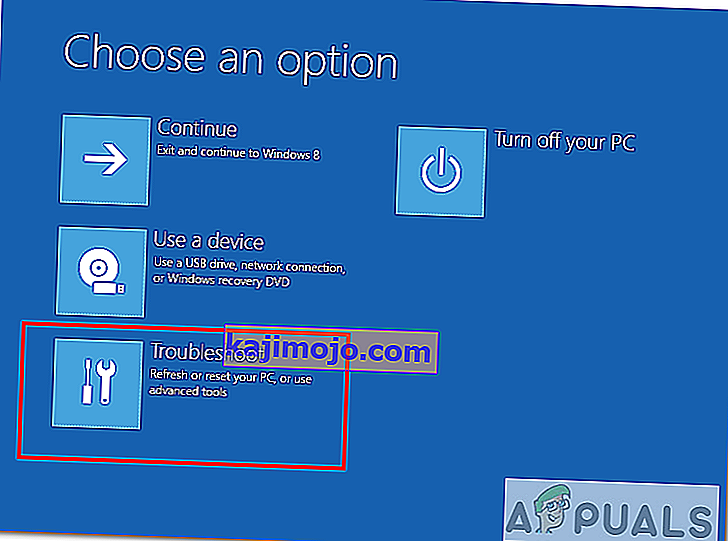
- Alumises vasakus nurgas, klõpsake remont arvuti ja valida tõrkeotsing alates Tehke valik ekraani.
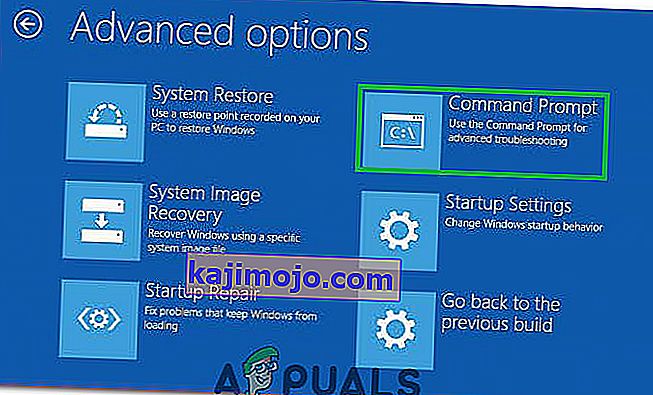
- Aastal Tõrkeotsing ekraanil nuppu Täpsemad suvandid ja klõpsa Command Prompt.
- Kui käsuviip avaneb, tippige järgmised käsud, vajutades klaviatuuri peal klahvi Enter .
bootrec / scanos bootrec / fixmbr bootrec / fixboot bootrec / rebuildbcd
- Taaskäivitage arvuti ja see peaks käima lihtsalt, ilma et peaksite probleemiga uuesti silmitsi seisma.

2. meetod: parandage operatsioonisüsteem taastekettaga
See meetod parandab teie operatsioonisüsteemi ka taasteketta käsuviibaga ja peaksite saama Windowsi käivitada ilma probleemiga uuesti silmitsi seistes. Käivitage taastekettalt ja järgige allolevaid juhiseid.
- Taasteketta käsuviibale jõudmiseks kasutage eelmise meetodi samme 1 kuni 3 .
- Kui olete käsuviiba sisenenud, tippige allolevad käsud ja nende täitmiseks klaviatuuril Enter . StartRep.exe kommunaalteenuste parandab boot keskkonna väärtuste ja peaks määrama BCD viga. Pange tähele, et võib-olla peate seda toimingut mitu korda kordama, kui see ebaõnnestub.
cd x: \ sources \ recovery StartRep.exe
- Kui eelmises etapis remont Windows ei aita, tüüp bcdedit sisse käsureale näha väärtused Windows Boot Manager.
- Märkus väärtusi Seadme . Kui need pole teada , tippige järgmised käsud, millele järgneb nende täitmiseks Enter . Pange tähele, et asendage C: vajadusel partitsiooniga, kuhu teie operatsioonisüsteem on installitud.
bcdedit / set {DEFAULT.EN_US} seadme sektsioon = c: bcdedit / set {DEFAULT.EN_US} osdevice partition = c: bcdedit / set {BOOTMGR.EN_US} seadme sektsioon = c:- Kui käsuviip on valmis, sulgege see, eemaldage taasteseade ja taaskäivitage süsteem. Selle käivitamisel ei tohiks olla mingeid probleeme.
Nende lahenduste ainus miinus on see, et need nõuavad taastumishimu, kannatlikkust ja tugevaid närve. Siiski, kui järgite neid nii, nagu neid kirjeldatakse, peaksite parandama saadud vea ja jätkama seadme kasutamist nagu varem.
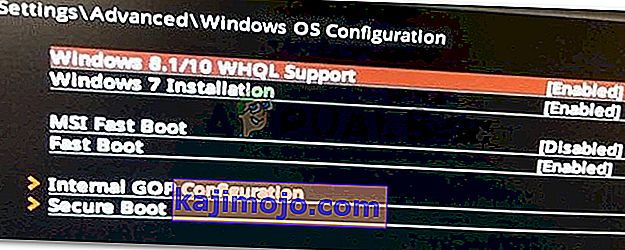
3. meetod: lubage Windows 10 WHQL-i tugi BIOS-is
Mõnes originaalseadmete tootjas on olemas Windows 10 WHQL-i tugiseade. Sellel on kaks põhifunktsiooni: kontrollib alglaadimise ajal allkirjastatud draivereid ja võimaldab teil lubada UEFI tuge. Kui kasutate Windows 10, peate selle lubama ja siis saab teie arvuti tavapäraselt käivitada. Kui see pole valitud, võib teie arvuti käivitada tõrke 0xc000000e. Niisiis, pääsete BIOS-ile, et näha, kas Windows 10 WHQL-i toe seade on lubatud. Kui ei, lubage tal proovida.
Peaksite arvestama, et Windows 10 WHQL-i tugisätet ei toeta kõik arvutid. Kui teie arvutis seda pole, võite minna kontrollima, kas teie arvutis on UEFI tugi lubatud. Kui ei, siis saate selle lubada, et näha, kas veakood 0xc000000e kaob. Selle lubamiseks:
- Lülitage arvuti täielikult välja ja laske sellel vähemalt paar minutit istuda.
- Pärast piisava aja möödumist veenduge, et käivitate arvuti varundamise ja peaksite märkama valikut „ Vajutage seda nuppu Bios-režiimi käivitamiseks ”.
- Bios-režiimi käivitamiseks vajutage nuppu.
- Pärast edukalt Bios-režiimis käivitamist kontrollige, kas Bios-is on Windowsi WHQL-i säte.
- Kui see on olemas, vajutage pärast nooleklahvide abil esiletõstmist selle valimiseks sisestusklahvi ja valige suvand „Lubatud” , et see arvutis lubada.
- Kontrollige , kas see lahendab probleemi.

Kui Windows 10 alglaadimise viga 0xc000000e ilmub ka pärast Windows 10 WHQL-i tugisätte või UEFI-tugi lubamist, peate võib-olla oma arvutis BIOS / UEFI konfiguratsiooni lähtestama.
4. meetod: taastage BCD Easy Recovery Essentialsi kaudu
Easy Recovery Essentials on ühe klõpsuga automaatne süsteemiparanduse funktsioon, mis sisaldab BCD täielikku remonti ja ümberehitust, et viga „0xc000000e” lahendada, isegi juhtudel, kui Windows ei käivitu vea tõttu.
EasyRE automatiseeritud alglaadimiskomponent lahendab kõik BCD-ga seotud probleemid, parandab BCD või loob selle uuesti nullist, kasutades korrektset laadimist keelduva partitsiooni õiget kodeeringut ja teed. Samuti märgistab see ketta võrgus olevaks, et tagada selle õige töö.
Easy Recovery Essentials parandab vea „0xc000000e” automaatselt, kasutades selle sisseehitatud automaatse paranduse võimalust. EasyRE on praegu saadaval Windows XP, Vista, 7, 8, 10 jaoks ja selle saab alla laadida ja luua igast arvutist.
- Hankige endale teine arvuti, mida saaksite kasutada USB loomiseks, mida kasutame arvuti käivitamiseks.
- Siit saate alla laadida lihtsa taastamise põhiteateid.

- Põletage pilt.
- Käivitage arvuti loodud Easy Recovery Essentialsi CD-lt või USB-lt.
- Kui EasyRE töötab, valige suvand „Automaatne parandus” ja klõpsake nuppu Jätka.
- Kui EasyRE on teie arvuti draive skanninud, tuvastage ja valige loendist Windowsi installi draivitäht ning klõpsake alustamiseks nuppu Automated Repair Option.
- Easy Recovery Essentials alustab valitud draivi probleemide analüüsimist. EasyRE testib ja proovib ketta, sektsiooni, alglaadija, failisüsteemi, alglaaduri ja registri vigu automaatselt parandada. Sekkumine pole vajalik, kuna EasyRE remont on täielikult automatiseeritud.
- Kui protsess on lõpule jõudnud, teatab EasyRE oma järeldustest. Arvuti taaskäivitamiseks ja muudatuste testimiseks klõpsake nuppu Taaskäivita .

5. meetod: lähtestage BIOS / UEFI konfiguratsioon
Some users said that their error 0xc000000e issue is solved by resetting the BIOS/UEFI configuration. So, you can consider trying this method to see whether this issue can be solved.
Step 1. Open BIOS Menu
To reset BIOS to default settings, you need to access the BIOS menu and find the Default Settings option first.
Windows 10 users can access advanced startup options Windows 10 and get into the BIOS menu. You can click Start -> Power, press and hold the Shift key, and click Restart button to reboot Windows into Windows Recovery Environment. Then click Troubleshoot -> Advanced Options -> UEFI Firmware Settings, and click Restart to enter into the BIOS settings screen.
Alternatively, you can also restart your computer normally and press the required key in the startup screen to boot into the BIOS settings window. The hotkey is varied from different computer manufacturers, and it could be F12, Del, Esc, F8, F2, etc.
Step 2. Find the Setup Defaults Option
The name and location of the “Setup Defaults” option may be different from various computers. It generally calls like: Load Default, Load Setup Defaults, Load Default Settings, Load BIOS Defaults, Load Optimal Defaults, etc.
Use the arrow keys on the computer keyboard to find the BIOS setup default option in the BIOS settings screen. You may find it in one of the BIOS tabs.
Step 3. Reset BIOS
After you find the Load Setup Defaults option, you can select it and press the Enter button to start resetting the BIOS to factory default settings in Windows 10.
At last, you can press F10 to save and exit BIOS. Your computer will automatically reboot. If you need to change BIOS settings again in the future, you can follow the same instructions to access BIOS again to change it.
Method 6: Mark Boot Disk As Online
It is possible in some cases, that the disk that you have connected to the computer or the USB that you are trying to boot from has been marked as offline by the computer. Some computers tend to prevent extra applications, hardware, and other things from being able to run as soon as the computer starts because it allows for more convenient and fast startup experience. Therefore, in this step, we will be marking the Disk as online.
You still need to use a bootable USB medium to do this job. We will show you a step-by-step guide here:
- After booting your computer from the bootable USB drive, you need to go to Next > Repair your computer. Then, you will enter WinRE.
- Go to Troubleshoot > Advanced options > Command Prompt.
- Make sure to properly enter your login credentials if you are asked by the computer.
- Type in the following command inside the command prompt to successfully launch the disk part utility on your computer.
diskpart
- Type in either one of the following commands in the next window to list the currently connected disk drives to your computer.
List Disk List Volume
- Once the disks have been listed, you need to identify the disk that contains the Windows operating system and the one that you want to mark as active.
- After identifying it, select the disk using the following command and replacing the alphabet with the driver letter of that disk.
select disk A Select Volume A (Replace A with the Drive Letter)
- After you have successfully selected the disk, you must mark the disk as online in order to initiate the recognization process of the disk at startup. Use the following commands to do that.
Online Disk Online Volume
- Type in the following command to successfully get out of the command prompt and restart your computer after that.
Exit
- Check to see if marking the Disk as online has fixed your issue.

Method 7: Check your data cables, BIOS and drivers
Unplug all HDD data cables, and then plug them again. Revert to the previous drivers and BIOS settings if they were changed, or use “Restore factory settings” option in the BIOS. Make sure to write down all current BIOS settings that were previously selected, just in case it is required to switch back. If the error is caused by a change of the SATA disk controller’s mode in the BIOS or firmware, the fix can be as simple as entering the BIOS and toggling the SATA controller’s “mode” setting. The exact instructions differ from one manufacturer to the other, but the options will resemble what is shown in the screenshots below.
To check the boot order, follow these steps:
- Restart the computer
- Press the necessary key to open the BIOS menu. This key depends on the computer manufacturer and computer model. This is usually listed on the first screen that appears on the monitor. It can be any of the following: Esc, Del, F2, F8, F10 or F12.
- If the screen shows multiple keys, find the key to open “BIOS”, “setup” or “BIOS menu”
- Attempt to toggle between all three (or more) modes until a combination that results in Windows booting successfully once more is found.
Method 8: Boot Windows In Safe Mode
If above solutions didn’t fix the problem, then Start Windows into safe mode. This will start your PC with minimum system requirements, will not load startup programs, add-ons etc. And allow performing troubleshooting steps to fix Boot Error 0xc000000e:
Before you enter the safe mode, you need to enter the Windows Recovery Environment (winRE). To do this, you will repeatedly turn your device OFF, then ON:
- Hold down the power button for 10 seconds to turn off your device.
- Press the power button again to turn on your device.
- On the first sign that Windows has started (for example, some devices show the manufacturer’s logo when restarting) hold down the power button for 10 seconds to turn off your device.
- Press the power button again to turn on your device.
- When Windows restarts, hold down the power button for 10 seconds to turn off your device.
- Press the power button again to turn on your device.
- Allow your device to fully restart and you should boot into the Windows Recovery Environment.
Now that you are in the Windows Recovery Environment, you will follow these steps to take you to safe mode:
- On the Choose an option, screen, select “Troubleshoot” and then “Advanced options.”

- Now click on “Startup Settings” and click on “Restart.”
- After your device restarts, you’ll see a list of options. Select option “4” from the list or press “F4” to enter Safe Mode.

Note: If you need to exit safe mode, simply restart your device, or:
- Press the “Windows logo key + R.”
- Type “msconfig” in the Run box and then select “OK”.

- Select the Boot tab and under Boot options, clear the Safe boot checkbox.

Method 9: Check your disk with CHKDSK utility
If the hard drive has its file integrity compromised, it is possible to use built-in Windows CHKDSK utility to scan the disk and fix the file system errors.
- Connect a USB drive that has been made bootable or insert the Windows Installation Disk on your computer.
- After connecting one of these, boot from that connected device.
- After booting your computer from the device, click on “Next” and then on the “Repair your Computer” option.
- On the next window, click on “Troubleshoot” and then on the “Advanced” Option.

- On the next screen, make sure to select the “CommandPrompt” option to successfully launch into the command prompt.
- Provide the login credentials of your account in order to boot inside the cmd.
- Inside the command prompt, type in the following command to successfully run the check disk utility on your computer.
chkdsk C: /f (Make sure to replace the "C" with the Drive letter of your partition).
- Confirm any on-screen prompts and wait for the scan to be fully completed.
- Check to see if the issue is fixed by performing this step.
Method 10: Disable fast startup Feature
If your computer has been set up to use the Fast Startup feature, you might be getting this error message on your screen because of doing so. The Fast Startup feature is known to malfunction with some operating systems and hardware combinations.
Basically, when enabled, the feature automatically sends some launch configurations to be stored in your RAM to allow for a faster startup as indicated by its name but this configuration data can sometimes be corrupted which can lead to this error on your computer. Therefore, in this step, we will be disabling it completely. For that:
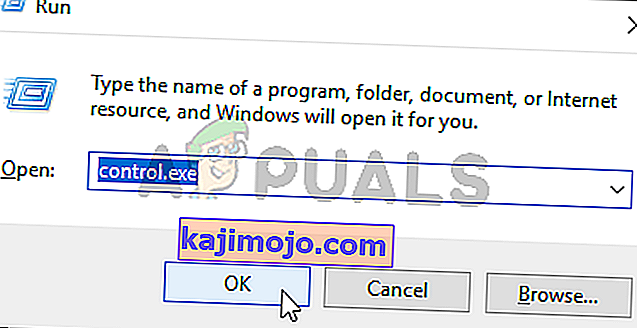
- Press “Windows” + “R” to open the Run prompt.
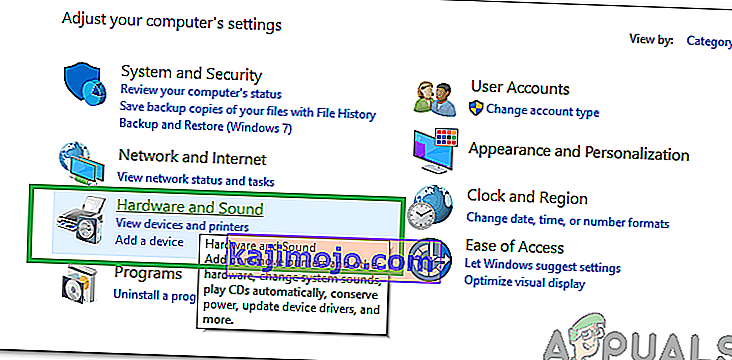
- Type in “Control Panel” and press “enter” to launch the classical Control Panel interface.
- Inside the control panel, click on the “Hardware and Sound” option and then select the “Power Options” button.
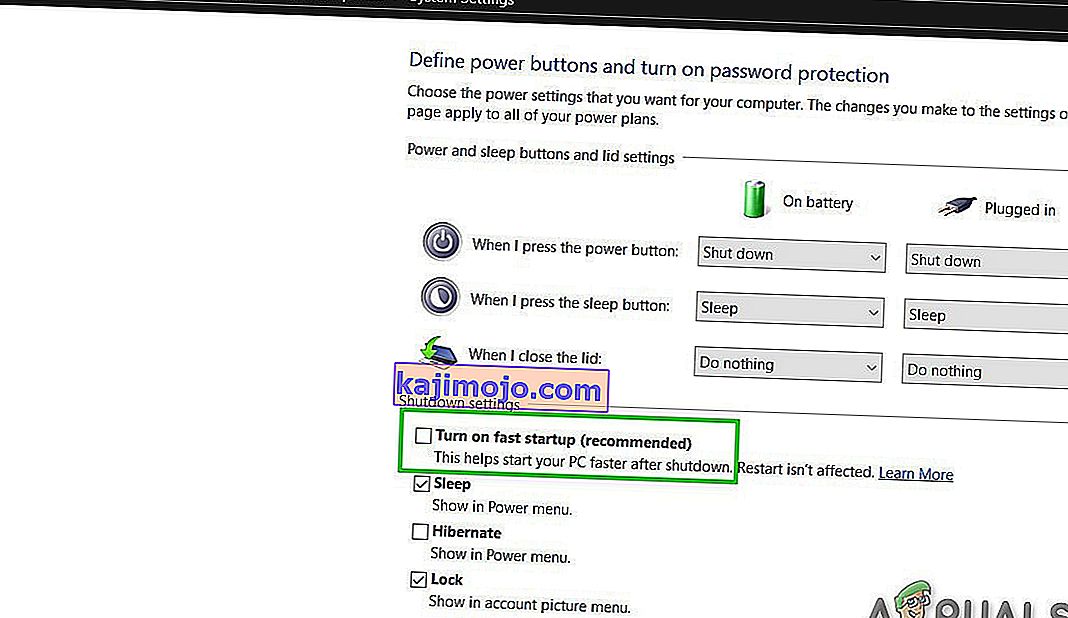
- Inside the power options, click on the “Choose what the power button does” from the left side.
- Click on the “Change Settings” option if the fast startup option is greyed out.
- Make sure to uncheck the “Turn on Fast Startup” option and save your changes.
- Closeout of the window and terminate any unnecessary applications.
- Click on the “Start Menu”, click on the “Power Options” and select “Shutdown” from the list.
- This option should completely power down your computer and after performing a complete shutdown, wait for some minutes before turning your computer back on.
- After the computer turns back on, check to see if the error message is fixed.
Note: This solution can only be applied if you are able to sometimes boot up your computer normally and are only encountering this error momentarily.


Method 11: Repair Corrupted System Files
It also possible in some situations that certain system files might have been corrupted due to a storage failure or due to some other reason. Therefore, in this step, we will be performing a complete repair of the corrupted system files and then we will check to see if doing so fixes this issue. For that:
- Press “Windows” + “R” to open the Run prompt.
- Type in “cmd” and then press “Shift” + “Ctrl” + “Enter” to launch the command prompt with admin privileges.
- Type in the following commands one by one and press “Enter” after each to successfully run an SFC scan and a DISM Scan on your computer.
DISM /Online /Cleanup-Image /RestoreHealth sfc /scannow
- Restart your computer completely once these scans are completed.
- Check to see if by performing these scans, you were able to fix this issue on your computer.

Method 12: Run Windows Startup Repair
Startup Repair is capable of diagnosing and fixing the found issues. For example, it can automatically scan system files, registry settings, configuration settings, etc. and try to fix the problem on its own. Startup Repair is especially useful when your computer is unbootable. Since your computer fails to boot, Windows can boot into WinRE automatically. While, if it doesn’t appear, you can interrupt the boot process three times in a row, and then the WinRE screen appears. Alternatively, if you have a bootable USB medium, you can also set your computer to boot from it and go to Repair your computer to enter WinRE.
After you have successfully booted into the Windows Recovery Environment, click on the “Troubleshoot” option, and from there, select the “Advanced Options” screen. Inside the advanced options, select the “StartupRepair” button to successfully initiate the Startup Repairing process. Windows will begin to diagnose your computer automatically. When the process ends, your computer will restart automatically. You can wait to see whether it can boot successfully.

Lahendus: veenduge, et enne käsureale või käivitusparandusse hüppamist pole ühtegi täiendavat seadet ühendatud. Parim on proovida teist taaskäivitamist, kui arvutisse on ühendatud kõige vähem seadmeid ja väliseid draive. See tagab, et miski, mis hiljuti arvutisse lisati, ei põhjusta seda probleemi. Parim oleks lahti ühendada kõik hiljutised USB-draivid, CD-d, DVD-d jne. See hõlmab ka mälukaardilugejat. Veenduge, et kõik välised draivid ja USB-võtmed või USB-draivid on lahti ühendatud, ja proovige uuesti.