Kasutajad puutuvad selle probleemiga tavaliselt kokku pärast Windows 10 värskendamist Windows Update'i (WU) kaudu. Viga 0x8024a105annab märku automaatse värskenduse komponentide probleemist .Tavaliselt näevad kasutajad pärast ebaõnnestunud värskendamist järgmist teadet:
„Mõnede värskenduste allalaadimisel tekkis probleeme, kuid proovime hiljem uuesti. Kui näete seda jätkuvalt, proovige abi otsida veebist või pöörduda tugiteenuse poole. See veakood võib aidata: (0x8024a105). "

Kui teil on selle probleemiga praegu probleeme, oleme suutnud tuvastada mõned elujõulised parandused, mis on edukalt aidanud teid sarnases olukorras olevaid kasutajaid. Järgige palun allpool toodud meetodeid, kuni leiate lahenduse, mis suudab teie probleemi lahendada.
1. meetod: Windows Update'i tõrkeotsingu käitamine
Alustame lihtsalt, käivitades Windows Update'i tõrkeotsingu. Mõned kasutajad on suutnud lubada värskendustel läbida, lubades sisseehitatud tõrkeotsingul katkised komponendid automaatselt parandada. Siin on kiire juhend Windows Update'i tõrkeotsingu käivitamiseks :
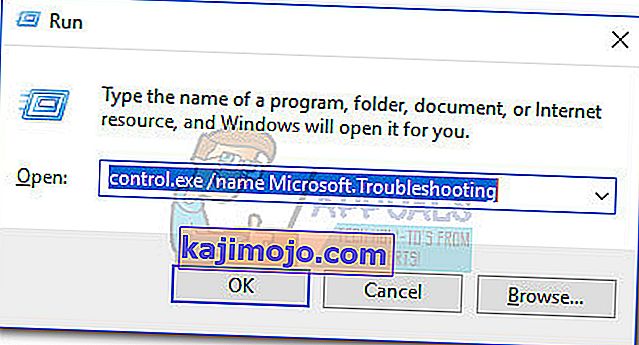
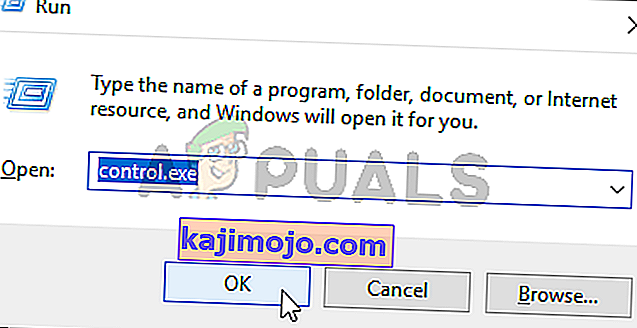
- Käivitusakna avamiseks vajutage Windowsi klahvi + R. Sisestage või kleepige järgmine.
control.exe / nimi Microsoft. Tõrkeotsing
Hit Sisesta avada sisseehitatud tõrkeotsija.
- Aastal Tõrkeotsing aken, klõpsake Windows Update , siis klõpsa Run vealeidjas .
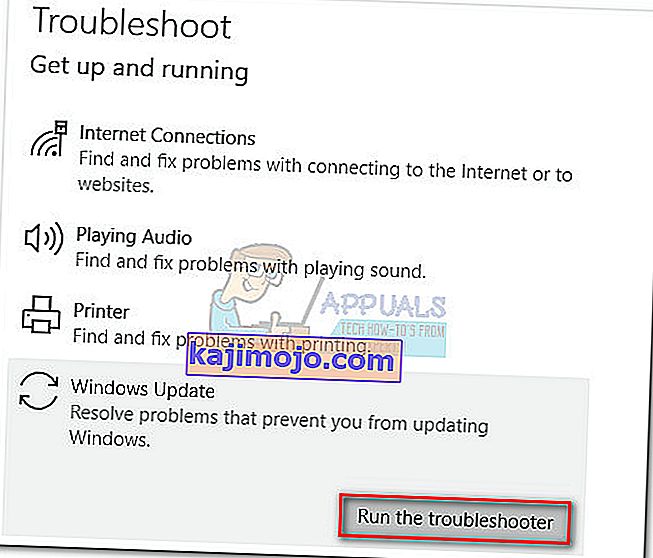
- Oodake, kuni tõrkeotsing tuvastab teie värskenduskliendiga probleeme. Kui tal õnnestub sellega probleeme tuvastada, järgige automaatse remondi käivitamiseks ekraanil kuvatavaid juhiseid. Tavaliselt peate lihtsalt valima selle paranduse rakendamise .
- Kui värskenduste tõrkeotsing teatab, et sellega õnnestus midagi parandada, taaskäivitage arvuti ja vaadake, kas probleem on järgmisel käivitamisel lahendatud.


Kui värskendused ikka nurjuvad tõrke 0x8024a105 korral, liikuge 2. meetodi juurde.
2. meetod: muutke kasutajakonto kontrolli (UAC) sätteid
Kui tõrkeotsingul ei õnnestunud probleemi automaatselt lahendada, vaatame, kas probleemi ei loonud kasutajakonto kontrolli säte. Nagu selgub, ebaõnnestusid mõned värskendused tõrke 0x8024a105 tõttu, kuna sisselogitud kontol pole vajalikke õigusi. Selle probleemi saate hõlpsalt lahendada, muutes oma kontoga seotud kasutajakontode õigused administraatoriks. Siin on kiire juhend selle tegemiseks:
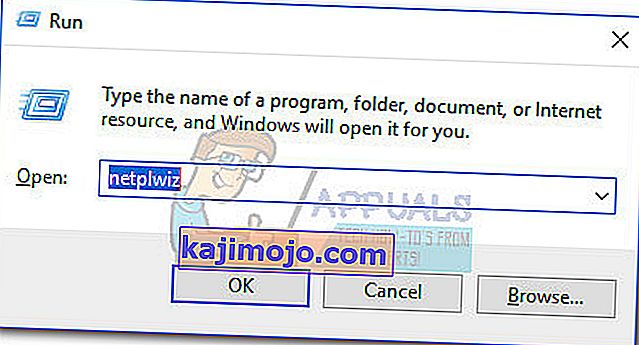
- Käivitusakna avamiseks vajutage Windowsi klahvi + R. Sisestage või kleepige “ netplwiz ” ja klõpsake sisseehitatud tõrkeotsingu avamiseks Enter .
- Valige vahekaardil Kasutajad kasutatava kasutaja ja klõpsake nuppu Atribuudid.
- Aastal omadused aken, minge grupikuuluvuste ja määrata tasemel juurdepääsu administraatori . Muudatuste salvestamiseks vajutage nuppu Rakenda .
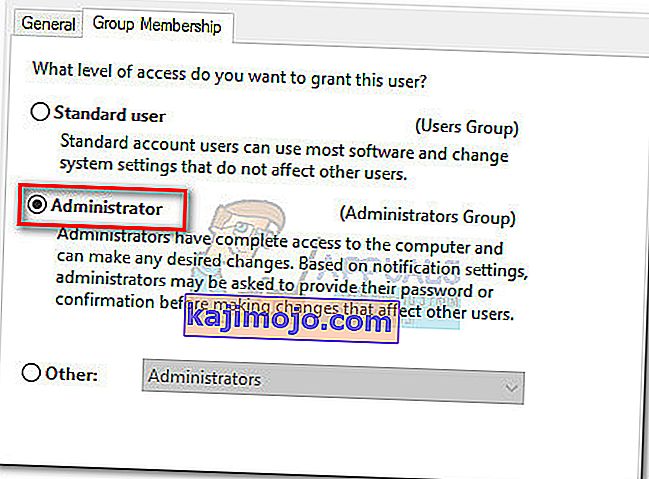 Märkus. Kui juurdepääsutasemeks on juba määratud administraator , minge otse 3. meetodi juurde .
 - Taaskäivitage arvuti ja logige sisse kindlasti sama kasutajakontoga. Kui käivitamine on lõpule jõudnud, proovige värskendusi uuesti teha. Kui näete, et viga 0x8024a105 ebaõnnestub, liikuge kolmanda meetodi juurde.

 Märkus. Kui juurdepääsutasemeks on juba määratud administraator , minge otse 3. meetodi juurde .
3. meetod: Windowsi värskenduste komponentide lähtestamine käsitsi
Kui ülaltoodud meetodid on osutunud ebaõnnestunuks, pole meil muud teha, kui Windowsi värskenduste komponendid käsitsi lähtestada ja seejärel Windows Update'i protsess taaskäivitada . Neljast esiletõstetud meetodist on selle meetodi õnnestumise tõenäosus suurem, kuid see nõuab rohkem kohandamist.
Siin on kiire juhend Windowsi värskenduste komponentide lähtestamiseks:
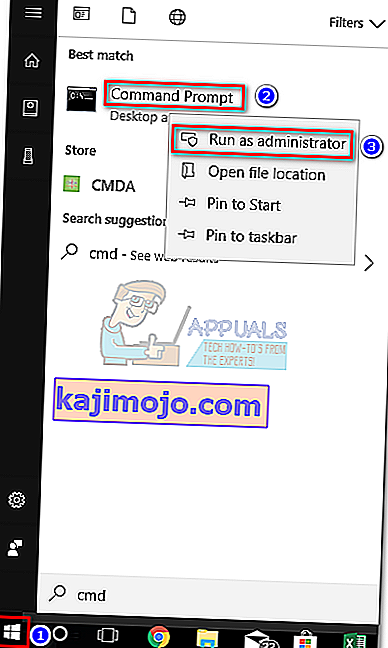
- Klõpsake Windowsi Start-ribal (vasakus alanurgas) ja otsige sõna „ cmd ”. Seejärel paremklõpsake käsuviip ja valige käsk Käivita administraatorina .
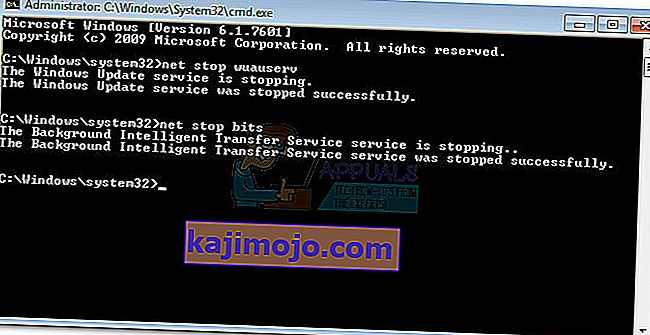
- Aastal käsuviiba, me peatada teenuste MSI Installer, Windows Update, otsikud ja krüptograafiateenuste . Selleks sisestage järgmised käsud ja vajutage nende järel Enter:
netopeatus wuauserv netopeatuse krüptSvc netopeatusbitid netopeatuse msiserver
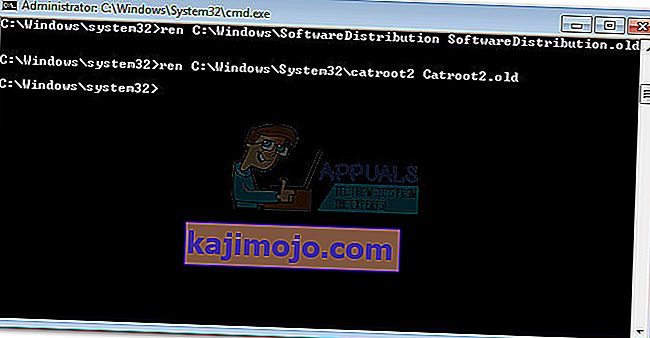
- Kui kõik teenused on peatatud, nimetame kausta SoftwareDistribution ja Catroot2 ümber, et sundida Windows Update'i oma komponendid uuesti käivitama. Kleepige või tippige kaks käsku kõrgemale käsuviipale ja vajutage igaühe järel sisestusklahvi:
ren C: \ Windows \ SoftwareDistribution SoftwareDistribution.old
ren C: \ Windows \ System32 \ catroot2 Catroot2.old
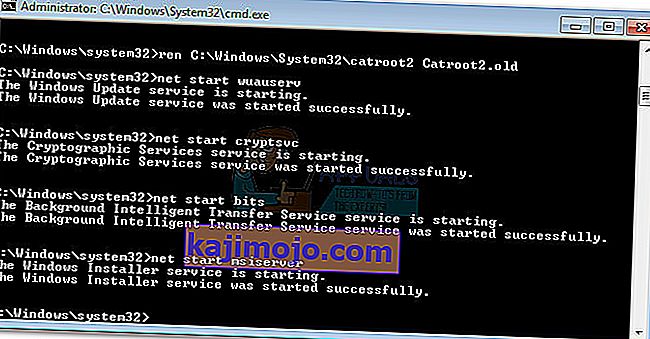
- Kui kaks kausta on ümber nimetatud, on aeg taaskäivitada MSI Installeri, BITSi, krüptograafia ja Windows Update'i teenused. Selleks tippige käsureale järgmine käsk ja vajutage iga käsu järel sisestusklahvi :
net start wuauserv net start cryptSvc neto algusbitid net start msiserver
- Kui teenused on taaskäivitatud, sulgege kõrgendatud käsuviip ja taaskäivitage arvuti.


4. meetod: kustutage tarkvara levitamise kaust
Mõnel juhul saab probleemi lahendada, lihtsalt kustutades kausta Powershelli abil. Seetõttu käivitame selles etapis kõigepealt PowerShelli administraatorina ja seejärel kustutame tarkvara levitamise kausta, et käivitada värskendusprotsess. Selle eest:
- Press “Windows” + “X” buttons simultaneously and select the “Power Shell(Admin)” option.
- Type in the following command and press “Enter” to execute it.
net stop wuauserv
- Again, type in the following command and press “Enter”.
net stop bits
- Lastly, navigate to the following folder.
C:\Windows\SoftwareDistribution
- Press “Ctrl” + “A” to select all the contents of the folder and press “Shift” + “Del” button to delete them permanently.

- Confirm any prompts that warn you about deleting these files and then reboot your computer to complete the process.
- Now, try to update and check to see if the issue persists.

Once your computer boots back up, see whether you are able to install the updates without the 0x8024a105 error. If you do, try to perform an SFC scan to fix any issues with missing files or drivers.
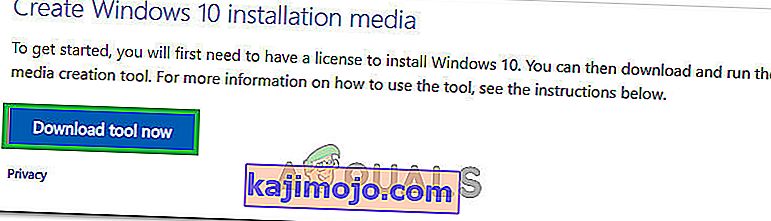
Method 5: Update Using Media Creation Tool
In some cases, you might be unable to update your computer using the default Windows Update process because your Windows might not be able to establish a proper connection with the Update servers. Therefore, in this step, we will be deploying the Windows Media Creation Tool to perform the update for us. It will automatically download and install the update files to upgrade our Windows. For that:
- Download the Windows Media Creation Tool from here.
- Run the executable and follow with the on-screen instructions for the initial setup.
- After the initial setup, select the “Upgrade this PC” option and click on “Next”.
- Accept the License terms and let the installer run.
- The tool will now automatically grab the update files from the servers and update your computer to the latest version available.
- Check to see if doing so has fixed the error.

Method 6: Delete Download Folders
When a new update is downloaded, it is generally stored in some folders on the computer. In this step, we will be deleting some of these folders and which will prompt the operating system to go ahead and download new files which can sometimes clear out the error and the update will be applied normally. For that:
- Press “Windows” + “R” to open the Run prompt.
- Type in “Control Panel” and press “Enter” to launch the classical control panel interface.
- In the Control Panel, click on the “View By:” option and select “Large Icons” from the list.
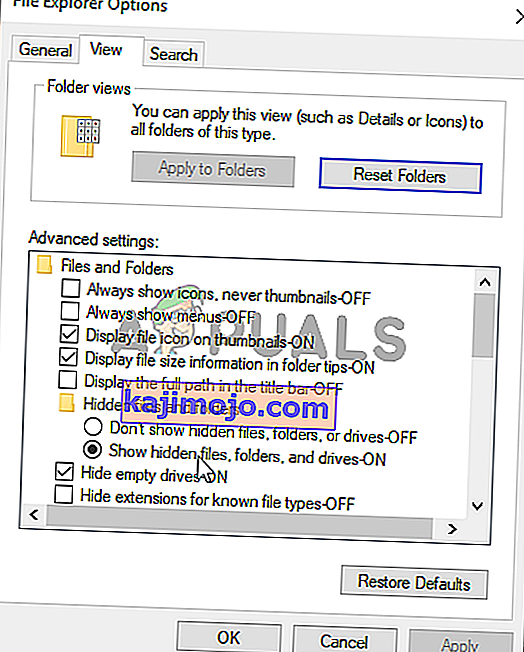
- Click on the “File Explorer Options” and a new window should pop up.
- In the File Explorer Options, click on the “View” button and then double click on the “Files and Folders” button to expand it.
- After that, double click on the ‘Hidden Files and Folders” to expand it as well.
- Check the “Show hidden Files, Folders and Drives” option and click on “Apply” to save your changes.
- Click on “OK” to close out of the window and press “Windows’ + “E” to launch the file explorer.
- In the File Explorer, delete the “$Windows.~WS” and “$Windows. ~BT” folders.
- Make sure to clear out the recycle bin as well so that they cannot be recovered.
- After this, press “Windows’ + “I” to launch settings and click on the “Update and Security” option.

- In Update and Security, click on the “Windows Update” option on the left pane and then click on the “Check for Updates” button.
- Updates will now automatically be downloaded and installed.
- Check to see if the issue persists.


Method 7: Resetting Catroot2 Folder
In some cases, it is possible that the Catroot2 folder and its files have either been corrupted or they have been misconfigured due to which this issue is being triggered. Therefore, in this step, we will first be making some changes from the command prompt and then we will delete the files inside that folder. For that:
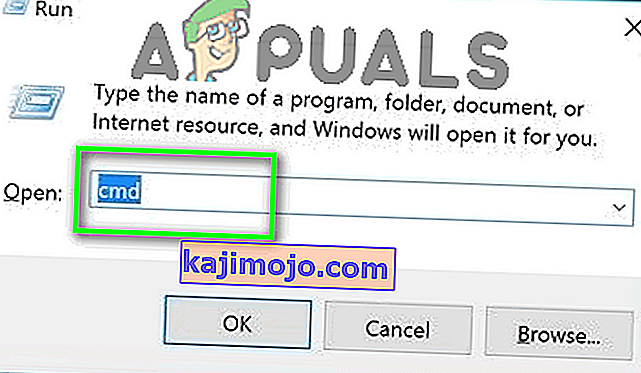
- Press “Windows’ + “R” to launch the run prompt.
- Type in “cmd” and then press “Shift” + “Ctrl” + “Enter” to provide administrative privileges.
- Type in the following command and press “Enter” to execute it.
net stop cryptsvc
- After you have stopped the cryptsvc using the command above, type in the following commands into the command prompt one by one and press “Enter” after each to execute them on your computer.
md %systemroot%system32catroot2.old xcopy %systemroot%system32catroot2 %systemroot%system32catroot2.old /s
- After executing the commands stated above, we will be deleting all the files from the catroot folder without deleting the folder itself.
- Press “Windows’ + “R” to open the Run prompt and type in the following address to navigate to the catroot folder.
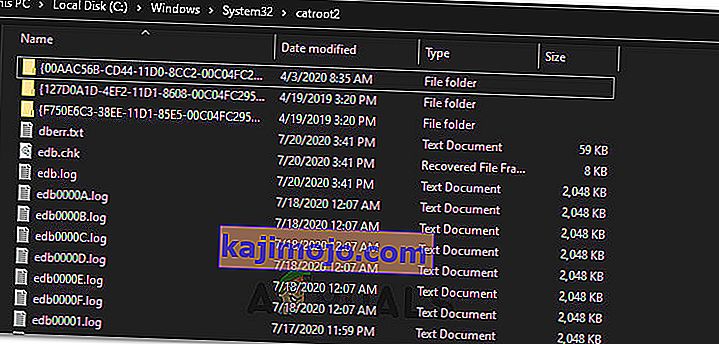
C:/Windows/System32/catroot2
- Press “Ctrl” + “A” once inside the folder to select all items inside it and press “Shift” + “Delete” to remove them from your computer.
- After removing these, confirm any prompts that might spring up on your screen.
- After that, open the command prompt back up and execute the following command.
net start cryptsvc
- Try to update your computer and check to see if the issue still persists.


Method 8: Configuring Services to Start Automatically
Sometimes, your computer might be preventing certain services from starting and functioning in the background due to which the update might not be properly installed or configured to be applied on your computer. Therefore, in this step, we will be setting up some services to startup automatically. For that:
- Press “Windows’ + “R” to launch the Run prompt.
- Type in “cmd” and press “Ctrl” + “Shift” + “Enter” to provide admin permissions.

- Type in the following commands one by one in the command prompt and press “Enter” after each to execute them.
SC Config wuauserv start=auto SC Config bits start=auto SC Config cryptsvc start=auto SC Config trustedinstaller start=auto
- This way, we will have configured these services to startup and run automatically in the background.
- Check to see if the issue persists.

Method 9: Re-register Windows Update and BITS Files
It is possible that some windows update files and Bits files might not be properly registered on your computer. Therefore, in this step, we will be re-registering these files on the computer and then we will check to see if that fixes our issue. For that:
- Press “Windows’ + “R’ to open the Run prompt.
- Type in “cmd” and then press the “Ctrl” + “Shift” + “Enter” buttons to provide admin permissions.

Type in the following commands one by one and press “Enter” after each to register the components.regsvr32.exe atl.dll regsvr32.exe urlmon.dll regsvr32.exe mshtml.dll regsvr32.exe shdocvw.dll regsvr32.exe browseui.dll regsvr32.exe jscript.dll regsvr32.exe vbscript.dll regsvr32.exe scrrun.dll regsvr32.exe msxml.dll regsvr32.exe msxml3.dll regsvr32.exe msxml6.dll regsvr32.exe actxprxy.dll regsvr32.exe softpub.dll regsvr32.exe wintrust.dll regsvr32.exe dssenh.dll regsvr32.exe rsaenh.dll regsvr32.exe gpkcsp.dll regsvr32.exe sccbase.dll regsvr32.exe slbcsp.dll regsvr32.exe cryptdlg.dll regsvr32.exe oleaut32.dll regsvr32.exe ole32.dll regsvr32.exe shell32.dll regsvr32.exe initpki.dll regsvr32.exe wuapi.dll regsvr32.exe wuaueng.dll regsvr32.exe wuaueng1.dll regsvr32.exe wucltui.dll regsvr32.exe wups.dll regsvr32.exe wups2.dll regsvr32.exe wuweb.dll regsvr32.exe qmgr.dll regsvr32.exe qmgrprxy.dll regsvr32.exe wucltux.dll regsvr32.exe muweb.dll regsvr32.exe wuwebv.dll
- After executing the commands listed above, check to see if the issue still persists.

Note: After trying the following fixes, if the issue still persists, try to perform a clean boot and check if that fixes it. If it does, update in the clean boot and then get out of it after the update is completed. If that doesn’t work, try to go for a clean install of Windows.